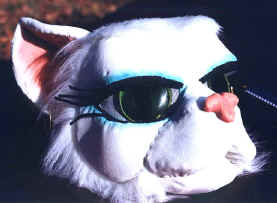
| Below is the finished head. It is covered entirely with stretch velvet for the base fur and then various lengths of faux fur were added on. The differing lengths of fur try to mimic the way an animal's fur would lie. They also serve to disguise certain joins and accent different features. | |
 |
 |
|
Finishing Materials: |
Tools: |
|
|
| The stretch velvet is stitched onto the head covering the foam and wrapping around all the edges. It is stretched taut over the ears, muzzle, brow and cheeks. Use neat, short, stabbing stitches to pull it down into the natural crevices of the face | |
 |
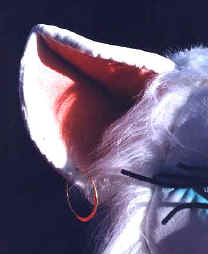 |
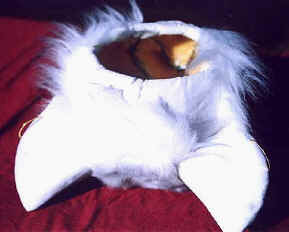
| You can see how the fabric is brought around the back edge to the interior. Large whip stitches can be used here as they're not seen, but not too long -- you don't want loops big enough to catch a finger in. | The interior of the ear was attached first. The exterior was brought around from the back and the raw edges were rolled under. This gives a more finished and life-like edge |
 |
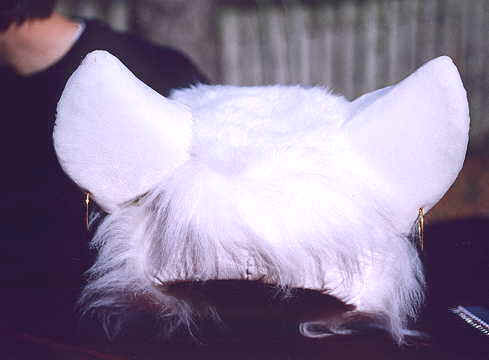 |
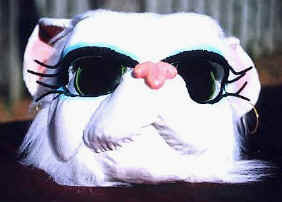
| The fur
was applied to the top and back of the head between the ears. The longer
fur that frames the jaw softens the line from head to body and looks
pretty, too!
Here and in the photos at top you can see how the fur extends well beyond the jawline. |
 |
 |
The velvet on the eyelids was wrapped around that edge to the inside where it was slightly gathered. The raw edge of the bottom lid was simple tucked under itself and carefully stitched to the edge. |
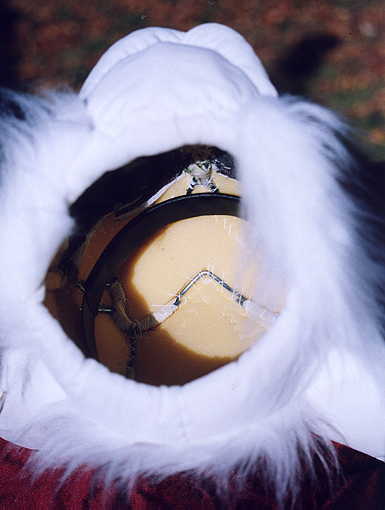
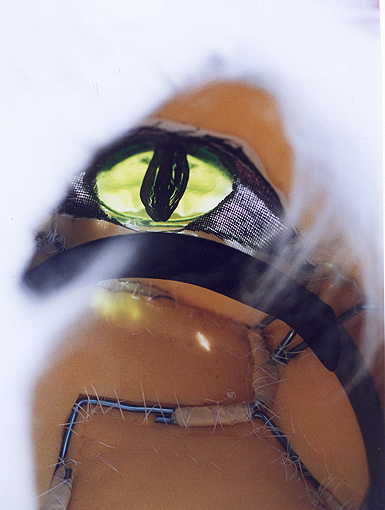
| The iris of the eyes are clear resin, tinted green. I did cast them myself in a metal form but casting resin can be tricky and I'm not going to go into it here. Suffice it to say I wanted bright green glossy eyes so I went to the extra effort. The pupil was don on the rear of resin with a black marker. | |
| The whites
of the eyes are white buckram. they were stitched to the wire frame from
the inside on either side of the iris. The iris themselves were glued to
the circular wire support with a silicon glue.
Note; the wire support is florist wire which is covered with a green clothy tape; the glue adheres quite well to this. In the photo to the right you can see how clear the iris are. I could see through them but it had a slightly underwater, wavy look. |
 |
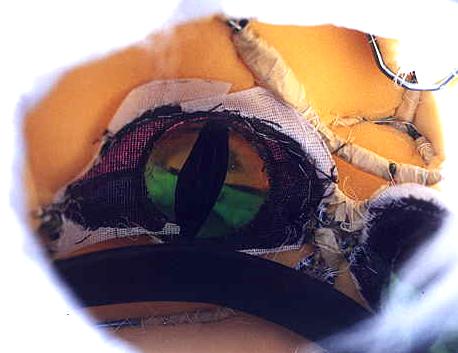 |
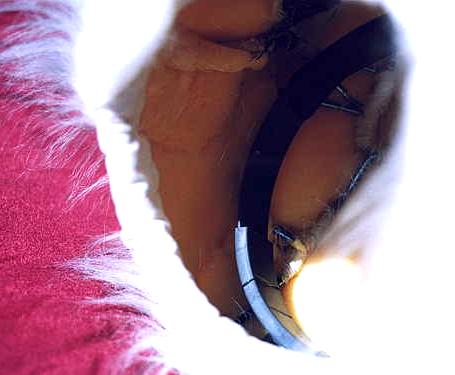
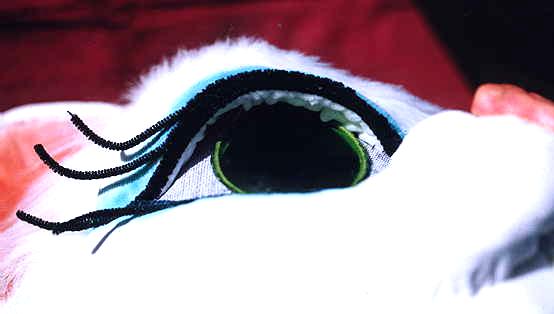
You'll
need to "black" the inside of the buckram or you get a nasty glare
from the white. This won't show through to the front.
You can see (to the left) more about how the buckram is attached. You can also see the taped wire joins and more of the stitching for the foam in this picture. |
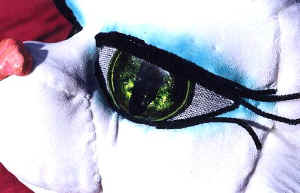
| Finishing
Touches:
Airbrushing: Green and blue shading was added around the eyes. And the interior of the ears was shaded with pink The eyelashes are made from black pipe cleaners which have been stitched down to frame the eye (like eyeliner). They also sweep out from the corner of the eyes And she has earrings. Standard pierced gold hoops which I just inserted through the cloth and foam.
|
 |
| On the next page I'll tell you about the construction of the bodysuit and tail. | |